Friday, January 21, 2022

Read the Dicom header information using dcm4che in Java

In this tutorial, we are going to learn how to get the Dicom file header information using dcm4che.

DICOM (Digital Imaging and Communications in Medicine) is the ubiquitous standard in the radiology and cardiology imaging industry for the exchange and management of images and image-related information.

For Dicom standard information please visit Dicom Library.

Before start writing code we need to use a couple of jar files. Download all the Dicom library files from the bundle. This bundle contains a lot of jar files we will use only the desired one.

Extract the downloaded file, go to the lib folder and grab two jar files. dcm4che-core-5.25.1.jar and another is slf4j-api-1.7.32.jar, the verison might be different at the time of implementation.

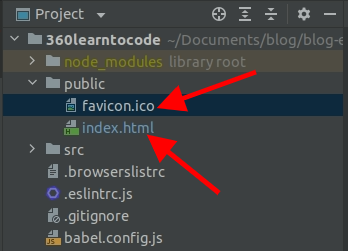
Now, create a folder called libs inside the project directory and add the jar file and load it from the IDE.

Loading Jar file in Maven Project:

<dependency>
          <groupId>com.dcm4che</groupId>
          <artifactId>dcm4che</artifactId>
          <version>20220117</version>
          <scope>system</scope>
          <systemPath>${basedir}/libs/dcm4che-core-5.25.1.jar</systemPath>
      </dependency>
<dependency>
          <groupId>com.slf4j</groupId>
          <artifactId>slf4j</artifactId>
          <version>20220217</version>
          <scope>system</scope>
          <systemPath>${basedir}/libs/slf4j-api-1.7.32.jar</systemPath>
      </dependency>

Note: use the downloaded jar file name.

Loading Jar in Gradle Project:

Add the following inside dependencies in build.gradle file.

dependencies {
//other dependencies
 
compile fileTree(dir: 'libs', include: '*.jar')
}

Let's create the java class ReadHeaderInfo.java to read the header information

public static void main(String[] args) {
        String inputDicomFilePath = "path/to/dicom/N2D_0001.dcm";
        try {
            readHeader(inputDicomFilePath);
        } catch (IOException e) {
            System.out.println("Error due to: "+e.getMessage());
        }
    }
private static void readHeader(String inputPath) throws IOException {
        File file = new File(inputPath);
        DicomInputStream dis = new DicomInputStream(file);
        Attributes attributes = dis.readDataset();
        int[] tags = attributes.tags();
        System.out.println("Total tag found in the given dicom file: "+tags.length);
        for (int tag: tags) {
            String tagAddress = TagUtils.toString(tag);
            String vr = attributes.getVR(tag).toString();
            System.out.println("Tag Address: " + tagAddress + " VR: " + vr);
        }
    }

Basically, we are using the Dicom-core classes from the jar file to read the file information. We are providing the sample Dicom file and reading the Tag Address and VR available in that file. 

DicomInputStream is used to read the file. dis.readDataset() read all the tags available in that file and finally, we are getting Tag Address and VR and outputting the values.

Output:

Total tag found in the given dicom file: 54
Tag Address: (0008,0008) VR: CS
Tag Address: (0008,0016) VR: UI
Tag Address: (0008,0018) VR: UI
Tag Address: (0008,0020) VR: DA
Tag Address: (0008,0021) VR: DA
Tag Address: (0008,0022) VR: DA
Tag Address: (0008,0023) VR: DA
Tag Address: (0008,0030) VR: TM
Tag Address: (0008,0031) VR: TM
Tag Address: (0008,0032) VR: TM
Tag Address: (0008,0033) VR: TM
Tag Address: (0008,0050) VR: SH
Tag Address: (0008,0060) VR: CS
Tag Address: (0008,0070) VR: LO
Tag Address: (0008,0080) VR: LO
Tag Address: (0008,0090) VR: PN
Tag Address: (0008,1030) VR: LO
Tag Address: (0008,103E) VR: LO
Tag Address: (0008,1090) VR: LO
Tag Address: (0010,0010) VR: PN
Tag Address: (0010,0020) VR: LO
Tag Address: (0010,0030) VR: DA
Tag Address: (0010,0040) VR: CS
Tag Address: (0010,1000) VR: LO
Tag Address: (0010,1010) VR: AS
Tag Address: (0010,1030) VR: DS
Tag Address: (0010,21C0) VR: US
Tag Address: (0018,0050) VR: DS
Tag Address: (0018,0088) VR: DS
Tag Address: (0018,1020) VR: LO
Tag Address: (0018,1030) VR: LO
Tag Address: (0020,000D) VR: UI
Tag Address: (0020,000E) VR: UI
Tag Address: (0020,0010) VR: SH
Tag Address: (0020,0011) VR: IS
Tag Address: (0020,0012) VR: IS
Tag Address: (0020,0013) VR: IS
Tag Address: (0020,0020) VR: CS
Tag Address: (0020,0032) VR: DS
Tag Address: (0020,0037) VR: DS
Tag Address: (0020,0052) VR: UI
Tag Address: (0028,0002) VR: US
Tag Address: (0028,0004) VR: CS
Tag Address: (0028,0010) VR: US
Tag Address: (0028,0011) VR: US
Tag Address: (0028,0030) VR: DS
Tag Address: (0028,0100) VR: US
Tag Address: (0028,0101) VR: US
Tag Address: (0028,0102) VR: US
Tag Address: (0028,0103) VR: US
Tag Address: (0028,1052) VR: DS
Tag Address: (0028,1053) VR: DS
Tag Address: (0028,1054) VR: LO
Tag Address: (7FE0,0010) VR: OW

Extracting the header information is important to visualize the Dicom file information.

The overall code implementation looks as below:

package dicom.dcm4che;

import org.dcm4che3.data.Attributes;
import org.dcm4che3.io.DicomInputStream;
import org.dcm4che3.util.TagUtils;

import java.io.File;
import java.io.IOException;

public class ReadHeaderInfo {

    public static void main(String[] args) {
        String inputDicomFilePath = "path/to/dicom/N2D_0001.dcm";
        try {
            readHeader(inputDicomFilePath);
        } catch (IOException e) {
            System.out.println("Error due to: "+e.getMessage());
        }
    }

    private static void readHeader(String inputPath) throws IOException {
        File file = new File(inputPath);
        DicomInputStream dis = new DicomInputStream(file);
        Attributes attributes = dis.readDataset();
        int[] tags = attributes.tags();
        System.out.println("Total tag found in the given dicom file: "+tags.length);
        for (int tag: tags) {
            String tagAddress = TagUtils.toString(tag);
            String vr = attributes.getVR(tag).toString();
            System.out.println("Tag Address: " + tagAddress + " VR: " + vr);
        }
        dis.close();
    }

}
Share:

Read the files inside directory(folder) and subdirectory(sub folder) using Java 8+

In this tutorial, we are going to learn how we can read all the files and specific files inside the directory and subdirectory.

Let's create a sample class FileReader.java

Read all the directory subdirectory and files:

 public static void main(String[] args) {
        String directoryPath = "path_to_directory";
        try {
            List<String> allFiles = listFiles(directoryPath);
            for (String filePath : allFiles) {
                System.out.println(filePath);
            }
        } catch (IOException e) {
            System.out.println("Error due to: " + e.getMessage());
        }
    }
    public static List<String> listFiles(String directoryPath) throws IOException {
        Path start = Paths.get(directoryPath);
        try (Stream<Path> stream = Files.walk(start, Integer.MAX_VALUE)) {
            return stream
                    .map(String::valueOf)
                    .sorted()
                    .collect(Collectors.toList());
        }
    }

listFiles() method list all the directory, subdirectory, and files present inside the given directory. We are using Files.walk which will return stream API; list the files, directory and subdirectory by walking through the start directory to the max level of the subdirectory. Integer.MAX_VALUE will go through the maximum level of subdirectories available.

Read all the files and folders inside the current directory:

    public static List<String> listFiles(String directoryPath) throws IOException {
        Path start = Paths.get(directoryPath);
        try (Stream<Path> stream = Files.walk(start, 1)) {
            return stream
                    .map(String::valueOf)
                    .sorted()
                    .collect(Collectors.toList());
        }
    }

Here, we are using 1 as a maximum level value instead of Integer.MAX_VALUE, so it will read the current directory.

Only read the files inside the directory and subdirectory:

    public static List<String> listFiles(String directoryPath) throws IOException {
        Path start = Paths.get(directoryPath);
        try (Stream<Path> stream = Files.walk(start, Integer.MAX_VALUE)) {
            return stream
                    .map(String::valueOf)
                    .filter(file -> !new File(file).isDirectory())
                    .sorted()
                    .collect(Collectors.toList());
        }
    }

We are adding the filter that will only read files but not the directory or subdirectory and returns only files present inside the given directory.

Read Specific files inside directory and subdirectory

Suppose we want to only read .jpg or .png or .zip files present inside the directory and subdirectory. In this case, we will apply the filter to read only the desired extension file.

public static void main(String[] args) {
        String directoryPath = "path_to_directory";
        try {
            String fileExtensionToRead = ".png";
            List<String> pngFiles = listFiles(directoryPath, fileExtensionToRead);
            for (String filePath : pngFiles) {
                System.out.println(filePath);
            }
        } catch (IOException e) {
            System.out.println("Error due to: " + e.getMessage());
        }
    }
private static List<String> listFiles(String directoryPath, String ext) throws IOException {
        Path start = Paths.get(directoryPath);
        try (Stream<Path> stream = Files.walk(start, Integer.MAX_VALUE)) {
            return stream
                    .map(String::valueOf)
                    .filter(file -> file.contains(ext))
                    .sorted()
                    .collect(Collectors.toList());
        }
    }

We are using a filter such that it will list the file if the filename contains the given extension. We can customize this filter as per our requirements.

The overall code implementation looks as below:

package io;

import java.io.File;
import java.io.IOException;
import java.nio.file.Files;
import java.nio.file.Path;
import java.nio.file.Paths;
import java.util.List;
import java.util.stream.Collectors;
import java.util.stream.Stream;

public class FileReader {

    public static void main(String[] args) {
        String directoryPath = "path_to_directory";
        try {
            List<String> allFiles = listFiles(directoryPath);
            for (String filePath : allFiles) {
                System.out.println(filePath);
            }
            String fileExtensionToRead = ".png";
            List<String> pngFiles = listFiles(directoryPath, fileExtensionToRead);
            for (String filePath : pngFiles) {
                System.out.println(filePath);
            }
        } catch (IOException e) {
            System.out.println("Error due to: " + e.getMessage());
        }
    }

    public static List<String> listFiles(String directoryPath) throws IOException {
        Path start = Paths.get(directoryPath);
        try (Stream<Path> stream = Files.walk(start, Integer.MAX_VALUE)) {
            return stream
                    .map(String::valueOf)
                    .filter(file -> !new File(file).isDirectory())
                    .sorted()
                    .collect(Collectors.toList());
        }
    }

    private static List<String> listFiles(String directoryPath, String ext) throws IOException {
        Path start = Paths.get(directoryPath);
        try (Stream<Path> stream = Files.walk(start, Integer.MAX_VALUE)) {
            return stream
                    .map(String::valueOf)
                    .filter(file -> file.contains(ext))
                    .sorted()
                    .collect(Collectors.toList());
        }
    }
}
Share:

Thursday, January 20, 2022

How to unzip the zip file and zip the folder in Java

In this tutorial, we are going to learn how to zip the given folder and unzip the zip file using Java.

Zip the folder or directory:

Let's create a java class ZipUnzip.java and create the main method.

public static void main(String[] args) {
        String folderInputPath = "path/of/folder/to/zip";
        String outputPath = "output/path/compressed.zip";
        try {
            zip(folderInputPath, outputPath);
        } catch (IOException e) {
            System.out.println("Error due to: " + e.getMessage());
        }
    }

Now, create a method to zip the folder.

private static void zip(String folderInputPath, String outputPath) throws IOException {
        Path sourceFolderPath = Paths.get(folderInputPath);
        File zipPath = new File(outputPath);
        ZipOutputStream zos = new ZipOutputStream(new FileOutputStream(zipPath));
        Files.walkFileTree(sourceFolderPath, new SimpleFileVisitor<Path>() {
            public FileVisitResult visitFile(Path file, BasicFileAttributes attrs) throws IOException {
                zos.putNextEntry(new ZipEntry(sourceFolderPath.relativize(file).toString()));
                Files.copy(file, zos);
                zos.closeEntry();
                return FileVisitResult.CONTINUE;
            }
        });
        zos.close();
    }

We are using java standard core library classes to zip. Files.walkFileTree() is used to navigate recursively through the directory tree. Once we execute the code we can see the zip file is created inside the output path provided. We can verify the compression manually by extracting it.

Unzip the zip file:

Let's create a method unzip() for unzipping the compressed file

 public static void main(String[] args) {
        String zipFilePath = "zip/file/path/compressed.zip";
        String zipOutputPath = "output/path/to/unzip";
        try {
            unzip(zipFilePath, zipOutputPath);
        } catch (IOException e) {
            System.out.println("Error due to: " + e.getMessage());
        }
    }
private static void unzip(String zipFilePath, String outputDir) throws IOException {
        byte[] buffer = new byte[1024];
        ZipInputStream zis = new ZipInputStream(new FileInputStream(zipFilePath));
        ZipEntry zipEntry = zis.getNextEntry();
        while (zipEntry != null) {
            File newFile = new File(outputDir + File.separator, zipEntry.getName());
            if (zipEntry.isDirectory()) {
                if (!newFile.isDirectory() && !newFile.mkdirs()) {
                    throw new IOException("Failed to create directory " + newFile);
                }
            } else {
                File parent = newFile.getParentFile();
                if (!parent.isDirectory() && !parent.mkdirs()) {
                    throw new IOException("Failed to create directory " + parent);
                }
                FileOutputStream fos = new FileOutputStream(newFile);
                int len = 0;
                while ((len = zis.read(buffer)) > 0) {
                    fos.write(buffer, 0, len);
                }
                fos.close();
            }
            zipEntry = zis.getNextEntry();
        }
        zis.closeEntry();
        zis.close();
    }

Here, we are using ZipInputStream to read the file and FileOutputStream to write the file to the provided output directory.

The overall code implementation looks like below:

package io;

import java.io.*;
import java.nio.file.*;
import java.nio.file.attribute.BasicFileAttributes;
import java.util.zip.ZipEntry;
import java.util.zip.ZipInputStream;
import java.util.zip.ZipOutputStream;

public class ZipUnzip {

    public static void main(String[] args) {
        String folderInputPath = "path/of/folder/to/zip";
        String outputPath = "output/path/compressed.zip";

        String zipFilePath = "zip/file/path/compressed.zip";
        String zipOutputPath = "output/path/to/unzip";
        try {
            zip(folderInputPath, outputPath);
            unzip(zipFilePath, zipOutputPath);
        } catch (IOException e) {
            System.out.println("Error due to: " + e.getMessage());
        }
    }

    private static void zip(String folderInputPath, String outputPath) throws IOException {
        Path sourceFolderPath = Paths.get(folderInputPath);
        File zipPath = new File(outputPath);
        ZipOutputStream zos = new ZipOutputStream(new FileOutputStream(zipPath));
        Files.walkFileTree(sourceFolderPath, new SimpleFileVisitor<Path>() {
            public FileVisitResult visitFile(Path file, BasicFileAttributes attrs) throws IOException {
                zos.putNextEntry(new ZipEntry(sourceFolderPath.relativize(file).toString()));
                Files.copy(file, zos);
                zos.closeEntry();
                return FileVisitResult.CONTINUE;
            }
        });
        zos.close();
    }

    private static void unzip(String zipFilePath, String outputDir) throws IOException {
        byte[] buffer = new byte[1024];
        ZipInputStream zis = new ZipInputStream(new FileInputStream(zipFilePath));
        ZipEntry zipEntry = zis.getNextEntry();
        while (zipEntry != null) {
            File newFile = new File(outputDir + File.separator, zipEntry.getName());
            if (zipEntry.isDirectory()) {
                if (!newFile.isDirectory() && !newFile.mkdirs()) {
                    throw new IOException("Failed to create directory " + newFile);
                }
            } else {
                File parent = newFile.getParentFile();
                if (!parent.isDirectory() && !parent.mkdirs()) {
                    throw new IOException("Failed to create directory " + parent);
                }
                FileOutputStream fos = new FileOutputStream(newFile);
                int len = 0;
                while ((len = zis.read(buffer)) > 0) {
                    fos.write(buffer, 0, len);
                }
                fos.close();
            }
            zipEntry = zis.getNextEntry();
        }
        zis.closeEntry();
        zis.close();
    }
}
Share:

Monday, January 17, 2022

Read Dicom Image metadata using PixelMed in Java

In this tutorial, we are going to learn how to get Dicom image metadata using PixelMed toolkit using Java.

DICOM (Digital Imaging and Communications in Medicine) is the ubiquitous standard in the radiology and cardiology imaging industry for the exchange and management of images and image-related information.

DICOM is also used in other images related medical fields, such as pathology, endoscopy, dentistry, ophthalmology, and dermatology.

PixelMed Java DICOM Toolkit is a stand-alone DICOM toolkit that implements code for reading and creating DICOM data, DICOM network and file support, a database of DICOM objects, support for display of directories, images, reports, and spectra, and DICOM object validation.

The toolkit is an implementation, which does not depend on any other DICOM tools. This is the freely available pure Java tools for compression and XML and database support.

Download the .jar file from PixelMed Jar. Create a folder called libs inside the project directory and add the jar file and load it from the Ide.

Loading Jar file in Maven Project:

Add the following system dependency inside pom.xml file.

<dependency>
           <groupId>com.pixelmed</groupId>
           <artifactId>pixelmed</artifactId>
           <version>20220117</version>
           <scope>system</scope>
           <systemPath>${basedir}/libs/pixelmed.jar</systemPath>
       </dependency>

Note: use the downloaded jar file name.

Loading Jar in Gradle Project:

Add the following inside dependencies in build.gradle file.

dependencies {
//other dependencies
 
compile fileTree(dir: 'libs', include: '*.jar')
}

Now, let's create a sample java class called ReadMetaDataPixelMed.java and create the main method to execute the code.

    private static AttributeList attributeList = new AttributeList();
public static void main(String[] args) {
        String dcmFilePath = "/path_to_dicom_image/N2D_0001.dcm";
        try {
            readAttributes(dcmFilePath);
            Map<String, String> metaData = readMetadata();
            for (Map.Entry<String, String> entry :metaData.entrySet()) {
                System.out.println(entry.getKey()+" : "+entry.getValue());
            }
        }catch (Exception e) {
            System.out.println("Error due to: "+e.getMessage());
        }
    }

Create the methods used inside it.

private static void readAttributes(String dcmFilePath) throws DicomException, IOException {
        attributeList.read(new File(dcmFilePath));
    }

readAttributes method read the attributes or tag of the Dicom image. For Dicom library Tags and their description please visit Dicom Library.

 private static Map<String, String> readMetadata() throws DicomException {
        Map<String, String> metaData = new LinkedHashMap<>();
        metaData.put("Patient Name", getTagInformation(TagFromName.PatientName));
        metaData.put("Patient ID", getTagInformation(TagFromName.PatientID));
        metaData.put("Transfer Syntax", getTagInformation(TagFromName.TransferSyntaxUID));
        metaData.put("SOP Class", getTagInformation(TagFromName.SOPClassUID));
        metaData.put("Modality", getTagInformation(TagFromName.Modality));
        metaData.put("Samples Per Pixel", getTagInformation(TagFromName.SamplesPerPixel));
        metaData.put("Photometric Interpretation", getTagInformation(TagFromName.PhotometricInterpretation));
        metaData.put("Pixel Spacing", getTagInformation(TagFromName.PixelSpacing));
        metaData.put("Bits Allocated", getTagInformation(TagFromName.BitsAllocated));
        metaData.put("Bits Stored", getTagInformation(TagFromName.BitsStored));
        metaData.put("High Bit", getTagInformation(TagFromName.HighBit));
        SourceImage img = new com.pixelmed.display.SourceImage(attributeList);
        metaData.put("Number of frames", String.valueOf(img.getNumberOfFrames()));
        metaData.put("Width", String.valueOf(img.getWidth()));
        metaData.put("Height", String.valueOf(img.getHeight()));
        metaData.put("Is Grayscale", String.valueOf(img.isGrayscale()));
        metaData.put("Pixel Data present", String.valueOf(!getTagInformation(TagFromName.PixelData).isEmpty()));
        return metaData;
    }

Here, we are reading some sample metadata. For more metadata lists please visit TagFromName.java class and use the desired one.

private static String getTagInformation(AttributeTag tag) {
        return Attribute.getDelimitedStringValuesOrDefault(attributeList, tag, "NOT FOUND");
    }

If the attribute is found then this method returns the value of that attribute if not found then return NOT FOUND text.

Output:

Patient Name : Jane_Doe
Patient ID : 02
Transfer Syntax : 1.2.840.10008.1.2
SOP Class : 1.2.840.10008.5.1.4.1.1.4
Modality : MR
Samples Per Pixel : 1
Photometric Interpretation : MONOCHROME2
Pixel Spacing : 0.666666686534882\0.699987828731537
Bits Allocated : 16
Bits Stored : 16
High Bit : 15
Number of frames : 1
Width : 274
Height : 384
Is Grayscale : true
Pixel Data present : true

The overall code implementation looks like below:

package dicom;

import com.pixelmed.dicom.*;
import com.pixelmed.display.SourceImage;

import java.io.File;
import java.io.IOException;
import java.util.LinkedHashMap;
import java.util.Map;

public class ReadMetaDataPixelMed {

    private static AttributeList attributeList = new AttributeList();

    public static void main(String[] args) {
        String dcmFilePath = "/path_to_dicom_image/N2D_0001.dcm";
        try {
            readAttributes(dcmFilePath);
            Map<String, String> metaData = readMetadata();
            for (Map.Entry<String, String> entry :metaData.entrySet()) {
                System.out.println(entry.getKey()+" : "+entry.getValue());
            }
        }catch (Exception e) {
            System.out.println("Error due to: "+e.getMessage());
        }
    }

    private static void readAttributes(String dcmFilePath) throws DicomException, IOException {
        attributeList.read(new File(dcmFilePath));
    }

    private static Map<String, String> readMetadata() throws DicomException {
        Map<String, String> metaData = new LinkedHashMap<>();
        metaData.put("Patient Name", getTagInformation(TagFromName.PatientName));
        metaData.put("Patient ID", getTagInformation(TagFromName.PatientID));
        metaData.put("Transfer Syntax", getTagInformation(TagFromName.TransferSyntaxUID));
        metaData.put("SOP Class", getTagInformation(TagFromName.SOPClassUID));
        metaData.put("Modality", getTagInformation(TagFromName.Modality));
        metaData.put("Samples Per Pixel", getTagInformation(TagFromName.SamplesPerPixel));
        metaData.put("Photometric Interpretation", getTagInformation(TagFromName.PhotometricInterpretation));
        metaData.put("Pixel Spacing", getTagInformation(TagFromName.PixelSpacing));
        metaData.put("Bits Allocated", getTagInformation(TagFromName.BitsAllocated));
        metaData.put("Bits Stored", getTagInformation(TagFromName.BitsStored));
        metaData.put("High Bit", getTagInformation(TagFromName.HighBit));
        SourceImage img = new com.pixelmed.display.SourceImage(attributeList);
        metaData.put("Number of frames", String.valueOf(img.getNumberOfFrames()));
        metaData.put("Width", String.valueOf(img.getWidth()));
        metaData.put("Height", String.valueOf(img.getHeight()));
        metaData.put("Is Grayscale", String.valueOf(img.isGrayscale()));
        metaData.put("Pixel Data present", String.valueOf(!getTagInformation(TagFromName.PixelData).isEmpty()));
        return metaData;
    }

    private static String getTagInformation(AttributeTag tag) {
        return Attribute.getDelimitedStringValuesOrDefault(attributeList, tag, "NOT FOUND");
    }
}
Share:

Sunday, January 16, 2022

Update the Dicom image metadata using Java

In this tutorial, we are going to learn how we can update the Dicom image metadata for the Dicom file.

We are using the SimpleITK library for this. SimpleITK library is very handy while working on medical image manipulation, processing, and analysis. Please follow our previous tutorial before starting this tutorial.

Simple Itk Installation for Java Application.

Read the Dicom Image metadata using Java

Let's create a sample java class ModifyMetaData.java. Create a main method that runs the update metadata code.

public static void main(String[] args) {
        String dcmImagePath = "input_dicom_image_path/N2D_0001.dcm";
        String metaDataKeyToUpdate = "0010|0020"; // Patient Id
        String metaDataValueToUpdate = "02L3000";
        String outputDcmPath = "output_dicom_image_path/output.dcm";
        try {
            ImageFileReader imageFileReader = getDcmImageFileReader(dcmImagePath);
            Image image = imageFileReader.execute(); // Read image
            updateMetaData(image, metaDataKeyToUpdate, metaDataValueToUpdate);
            writeImage(image, outputDcmPath);
        } catch (Exception e) {
            System.out.println("Error due to: " + e.getMessage());
        }
    }

Here, we are defining the input Dicom image path, metadata key to update. The metadata tag must be in the format of 0010|0020. Metadata value to update and the output Dicom image path to save the update Dicom image.

First, we are reading the Dicom image then we are updating the image with the tag value for the tag. Here we are using the patient Id tag to update. Please visit the Dicom library for the universal Dicom tag and its description.

Let's implement the method used in the main method.

private static ImageFileReader getDcmImageFileReader(String imagePath) {
        ImageFileReader imageFileReader = new ImageFileReader();
        imageFileReader.setImageIO("GDCMImageIO");
        imageFileReader.setFileName(imagePath);
        return imageFileReader;
    }

This method reads the Dicom image using the SimpleItk library.

private static void updateMetaData(Image image, String metaDataKey, String metaDataValue) {
        image.setMetaData(metaDataKey, metaDataValue);
    }

Here, we are simply updating the patient id provided with the value

private static void writeImage(Image image, String outputImagePath) {
        SimpleITK.writeImage(image, outputImagePath);
    }

Here, we are writing the updated Dicom image to the output file path. If we verify the file then the Dicom image, the Patient Id value is changed.

The overall code implementation looks as below:

package simpleitk;

import org.itk.simple.Image;
import org.itk.simple.ImageFileReader;
import org.itk.simple.SimpleITK;

public class ModifyMetaData {

    public static void main(String[] args) {
        String dcmImagePath = "input_dicom_image_path/N2D_0001.dcm";
        String metaDataKeyToUpdate = "0010|0020"; // Patient Id
        String metaDataValueToUpdate = "02L3000";
        String outputDcmPath = "output_dicom_image_path/output.dcm";
        try {
            ImageFileReader imageFileReader = getDcmImageFileReader(dcmImagePath);
            Image image = imageFileReader.execute(); // Read image
            updateMetaData(image, metaDataKeyToUpdate, metaDataValueToUpdate);
            writeImage(image, outputDcmPath);
        } catch (Exception e) {
            System.out.println("Error due to: " + e.getMessage());
        }
    }

    private static ImageFileReader getDcmImageFileReader(String imagePath) {
        ImageFileReader imageFileReader = new ImageFileReader();
        imageFileReader.setImageIO("GDCMImageIO");
        imageFileReader.setFileName(imagePath);
        return imageFileReader;
    }

    private static void updateMetaData(Image image, String metaDataKey, String metaDataValue) {
        image.setMetaData(metaDataKey, metaDataValue);
    }

    private static void writeImage(Image image, String outputImagePath) {
        SimpleITK.writeImage(image, outputImagePath);
    }
}
Share:

How to convert byte arrays to other data type and vice versa in Java

In this tutorial, we are going to learn how we can convert byte arrays to other data types like int, float, double, and vice versa. This conversion is the best practice for data transfer between different channels, I/O operations. 

By doing so, we can serialize and deserialize without changing the underlying data. If we want to create the binary files of different data types then first convert them to byte array and store them into a file.

Let's create a sample java class called ByteConverter.java

Convert Integer to a Byte array:

import java.nio.ByteBuffer;
import java.nio.ByteOrder;
public static byte[] toBytes(int intValue) {
        int times = Integer.SIZE / Byte.SIZE;
        return getAllocateByteBuffer(times).putInt(intValue).array();
    }
public static final ByteOrder LITTLE_ENDIAN = ByteOrder.LITTLE_ENDIAN;
private static ByteBuffer getAllocateByteBuffer(int var) {
        return ByteBuffer.allocate(var).order(LITTLE_ENDIAN);
    }

Here, we are creating the toBytes() method which gets the allocated buffer and converts the Integer value to the Byte array. We are using ByteOrder as little-endian. Little-endian stores the least-significant byte at the smallest address. For more details on types of Endian visit Endianness.

Create a main method to test.

 public static void main(String[] args) {
        int a = 289;
        byte[] bytes = toBytes(a);
        System.out.println(Arrays.toString(bytes));
    }

Output:

[33, 1, 0, 0]

Convert Byte array to Integer:

  public static int toInteger(byte[] bytes) {
        return getByteBuffer(bytes).getInt();
    }
private static ByteBuffer getByteBuffer(byte[] bytes) {
        return ByteBuffer.wrap(bytes).order(LITTLE_ENDIAN);
    }
public static void main(String[] args) {
        byte[] bytes = {33, 1, 0, 0};
        int b = toInteger(bytes);
        System.out.println(b);
    }

Output:

289

Convert Double to Bytes and Vice versa:

 public static byte[] toBytes(double doubleValue) {
        int times = Double.SIZE / Byte.SIZE;
        return getAllocateByteBuffer(times).putDouble(doubleValue).array();
    }
public static double toDouble(byte[] bytes) {
        return getByteBuffer(bytes).getDouble();
    }
public static void main(String[] args) {
        double d = 45.56;
        byte[] doubleToBytes = toBytes(d);
        System.out.println("Double to bytes: "+ Arrays.toString(doubleToBytes));
        double bytesToDouble = toDouble(doubleToBytes);
        System.out.println("Bytes to Double: " + bytesToDouble);
    }

Convert Float to Bytes and vice versa:

public static byte[] toBytes(float floatValue) {
        int times = Float.SIZE / Byte.SIZE;
        return getAllocateByteBuffer(times).putFloat(floatValue).array();
    }
public static float toFloat(byte[] bytes) {
        return getByteBuffer(bytes).getFloat();
    }
public static void main(String[] args) {
        float f = 15.0f;
        byte[] floatToBytes = toBytes(f);
        System.out.println("Float to bytes: "+ Arrays.toString(floatToBytes));
        double bytesToFloat = toFloat(floatToBytes);
        System.out.println("Bytes to Float: " + bytesToFloat);
    }

Convert Integer array to byte array and vice versa:

 public static byte[] byteArray(int[] intArray) {
        int times = Integer.SIZE / Byte.SIZE;
        byte[] bytes = new byte[intArray.length * times];
        for (int i = 0; i < intArray.length; i++) {
            getByteBuffer(bytes, i, times).putInt(intArray[i]);
        }
        return bytes;
    }
 public static int[] intArray(byte[] byteArray) {
        int times = Integer.SIZE / Byte.SIZE;
        int[] ints = new int[byteArray.length / times];
        for (int i = 0; i < ints.length; i++) {
            ints[i] = getByteBuffer(byteArray, i, times).getInt();
        }
        return ints;
    }
private static ByteBuffer getByteBuffer(byte[] bytes, int index, int times) {
        return ByteBuffer.wrap(bytes, index * times, times).order(LITTLE_ENDIAN);
    }
public static void main(String[] args) {
        int[] intArray = {3, 4, 6, 8};
        byte[] intByteArray = byteArray(intArray);
        System.out.println("Int array to byte array: "+ Arrays.toString(intByteArray));
        int[] byteArrayToIntArray = intArray(intByteArray);
        System.out.println("Byte array to Int array: "+ Arrays.toString(byteArrayToIntArray));
    }

Here, while converting from int array to byte array, we are looping through the int array and for each integer value, we are converting into bytes. and applying the reverse process while converting from byte array to integer array.

Convert Double array to Byte array and vice versa:

 public static byte[] byteArray(double[] doubleArray) {
        int times = Double.SIZE / Byte.SIZE;
        byte[] bytes = new byte[doubleArray.length * times];
        for (int i = 0; i < doubleArray.length; i++) {
            getByteBuffer(bytes, i, times).putDouble(doubleArray[i]);
        }
        return bytes;
    }
 public static double[] doubleArray(byte[] bytes) {
        int times = Double.SIZE / Byte.SIZE;
        double[] doubles = new double[bytes.length / times];
        for (int i = 0; i < doubles.length; i++) {
            doubles[i] = getByteBuffer(bytes, i, times).getDouble();
        }
        return doubles;
    }
public static void main(String[] args) {
        double[] doubleArray = {3.0, 4.0, 6.0, 8.0};
        byte[] doubleByteArray = byteArray(doubleArray);
        System.out.println("Double array to byte array: "+ Arrays.toString(doubleByteArray));
        double[] byteArrayToDoubleArray = doubleArray(doubleByteArray);
        System.out.println("Byte array to Double array: "+ Arrays.toString(byteArrayToDoubleArray));
    }

Convert Float array to Byte array and vice versa:

 public static byte[] byteArray(float[] floatArray) {
        int times = Float.SIZE / Byte.SIZE;
        byte[] bytes = new byte[floatArray.length * times];
        for (int i = 0; i < floatArray.length; i++) {
            getByteBuffer(bytes, i, times).putFloat(floatArray[i]);
        }
        return bytes;
    }
 public static float[] floatArray(byte[] bytes) {
        int times = Float.SIZE / Byte.SIZE;
        float[] floats = new float[bytes.length / times];
        for (int i = 0; i < floats.length; i++) {
            floats[i] = getByteBuffer(bytes, i, times).getFloat();
        }
        return floats;
    }
public static void main(String[] args) {
        float[] floatArray = {3.0f, 4.0f, 6.0f, 8.0f};
        byte[] floatByteArray = byteArray(floatArray);
        System.out.println("Float array to byte array: "+ Arrays.toString(floatByteArray));
        float[] byteArrayToFloatArray = floatArray(floatByteArray);
        System.out.println("Byte array to Float array: "+ Arrays.toString(byteArrayToFloatArray));

    }

The overall code implementation looks as below:

package io;

import java.nio.ByteBuffer;
import java.nio.ByteOrder;
import java.util.Arrays;

public class ByteConverter {

    public static final ByteOrder LITTLE_ENDIAN = ByteOrder.LITTLE_ENDIAN;

    public static void main(String[] args) {
        int i = 289;
        byte[] intToBytes = toBytes(i);
        System.out.println("Int to bytes: "+ Arrays.toString(intToBytes));
        int byteToInt = toInteger(intToBytes);
        System.out.println("Bytes to Int: " + byteToInt);
        double d = 45.56;
        byte[] doubleToBytes = toBytes(d);
        System.out.println("Double to bytes: "+ Arrays.toString(doubleToBytes));
        double bytesToDouble = toDouble(doubleToBytes);
        System.out.println("Bytes to Double: " + bytesToDouble);
        float f = 15.0f;
        byte[] floatToBytes = toBytes(f);
        System.out.println("Float to bytes: "+ Arrays.toString(floatToBytes));
        double bytesToFloat = toFloat(floatToBytes);
        System.out.println("Bytes to Float: " + bytesToFloat);
        int[] intArray = {3, 4, 6, 8};
        byte[] intByteArray = byteArray(intArray);
        System.out.println("Int array to byte array: "+ Arrays.toString(intByteArray));
        int[] byteArrayToIntArray = intArray(intByteArray);
        System.out.println("Byte array to Int array: "+ Arrays.toString(byteArrayToIntArray));
        double[] doubleArray = {3.0, 4.0, 6.0, 8.0};
        byte[] doubleByteArray = byteArray(doubleArray);
        System.out.println("Double array to byte array: "+ Arrays.toString(doubleByteArray));
        double[] byteArrayToDoubleArray = doubleArray(doubleByteArray);
        System.out.println("Byte array to Double array: "+ Arrays.toString(byteArrayToDoubleArray));
        float[] floatArray = {3.0f, 4.0f, 6.0f, 8.0f};
        byte[] floatByteArray = byteArray(floatArray);
        System.out.println("Float array to byte array: "+ Arrays.toString(floatByteArray));
        float[] byteArrayToFloatArray = floatArray(floatByteArray);
        System.out.println("Byte array to Float array: "+ Arrays.toString(byteArrayToFloatArray));

    }

    public static byte[] toBytes(int intValue) {
        int times = Integer.SIZE / Byte.SIZE;
        return getAllocateByteBuffer(times).putInt(intValue).array();
    }

    public static byte[] toBytes(double doubleValue) {
        int times = Double.SIZE / Byte.SIZE;
        return getAllocateByteBuffer(times).putDouble(doubleValue).array();
    }

    public static byte[] toBytes(float floatValue) {
        int times = Float.SIZE / Byte.SIZE;
        return getAllocateByteBuffer(times).putFloat(floatValue).array();
    }

    public static byte[] byteArray(int[] intArray) {
        int times = Integer.SIZE / Byte.SIZE;
        byte[] bytes = new byte[intArray.length * times];
        for (int i = 0; i < intArray.length; i++) {
            getByteBuffer(bytes, i, times).putInt(intArray[i]);
        }
        return bytes;
    }

    public static byte[] byteArray(double[] doubleArray) {
        int times = Double.SIZE / Byte.SIZE;
        byte[] bytes = new byte[doubleArray.length * times];
        for (int i = 0; i < doubleArray.length; i++) {
            getByteBuffer(bytes, i, times).putDouble(doubleArray[i]);
        }
        return bytes;
    }

    public static byte[] byteArray(float[] floatArray) {
        int times = Float.SIZE / Byte.SIZE;
        byte[] bytes = new byte[floatArray.length * times];
        for (int i = 0; i < floatArray.length; i++) {
            getByteBuffer(bytes, i, times).putFloat(floatArray[i]);
        }
        return bytes;
    }

    public static int toInteger(byte[] bytes) {
        return getByteBuffer(bytes).getInt();
    }

    public static double toDouble(byte[] bytes) {
        return getByteBuffer(bytes).getDouble();
    }

    public static float toFloat(byte[] bytes) {
        return getByteBuffer(bytes).getFloat();
    }

    public static int[] intArray(byte[] byteArray) {
        int times = Integer.SIZE / Byte.SIZE;
        int[] ints = new int[byteArray.length / times];
        for (int i = 0; i < ints.length; i++) {
            ints[i] = getByteBuffer(byteArray, i, times).getInt();
        }
        return ints;
    }

    public static double[] doubleArray(byte[] bytes) {
        int times = Double.SIZE / Byte.SIZE;
        double[] doubles = new double[bytes.length / times];
        for (int i = 0; i < doubles.length; i++) {
            doubles[i] = getByteBuffer(bytes, i, times).getDouble();
        }
        return doubles;
    }

    public static float[] floatArray(byte[] bytes) {
        int times = Float.SIZE / Byte.SIZE;
        float[] floats = new float[bytes.length / times];
        for (int i = 0; i < floats.length; i++) {
            floats[i] = getByteBuffer(bytes, i, times).getFloat();
        }
        return floats;
    }

    private static ByteBuffer getByteBuffer(byte[] bytes) {
        return ByteBuffer.wrap(bytes).order(LITTLE_ENDIAN);
    }

    private static ByteBuffer getAllocateByteBuffer(int var) {
        return ByteBuffer.allocate(var).order(LITTLE_ENDIAN);
    }

    private static ByteBuffer getByteBuffer(byte[] bytes, int index, int times) {
        return ByteBuffer.wrap(bytes, index * times, times).order(LITTLE_ENDIAN);
    }
}

Share:

Friday, January 14, 2022

How to remove hash mode(#) from URL in VueJs application

This is a quick tutorial on how we can get rid of hash mode(#) from the URL in the Vue.js application

While using Vue router, the default mode is a hash mode. So when the user tries to load the page like http://localhost:8080/invalid/url then it will redirect to the base URL with hash.

We can simply remove hash mode by adding history mode while initializing the Vue router

const router = new VueRouter({
  mode: 'history',
  base: process.env.BASE_URL,
  routes
})

This initialization can be found under folder >> src >> router >> index.js if we initialized the application with router setup using Vue CLI. Or in main.js file.

Once we remove the hash mode the user with an invalid URL might get a 404 not found error. For this, we need to manage the configuration in the server where we deploy the application.

For this, we need to configure in such a way that for the invalid users, we will redirect the user to index.html page which will open the base URL of the application.

In Nginx

location / {
  try_files $uri $uri/ /index.html;
}

In Apache

<IfModule mod_rewrite.c>
    RewriteEngine On
    RewriteBase /
    RewriteRule ^index\.html$ - [L]
    RewriteCond %{REQUEST_FILENAME} !-f
    RewriteCond %{REQUEST_FILENAME} !-d
    RewriteRule . /index.html [L]
</IfModule>

In Firebase inside firebase.json add the following JSON config

{
  "hosting": {
    "public": "dist",
    "ignore": [
      "firebase.json",
      "**/.*",
      "**/node_modules/**"
    ],
    "rewrites": [
      {
        "source": "**",
        "destination": "/index.html"
      }
    ]
  }
}

For more server configuration please visit the vue-router page.

Share:

Adding global CSS in VueJs application

This is a quick tutorial on how we can add the global CSS in the Vue.js application.

In each Vue.js component, we can add the component-based CSS which means the CSS will only be applicable for that component.

This can be done by using the scoped keyword in style tag inside the component as below:

<template>
   <div>
    </div>
</template>

<script>
  
</script>

<style scoped>
    /*add your css here*/
    
</style>

If we have the common CSS, we need to use a global CSS file to add it and use the class name inside the HTML element inside components.

For this, let's create a css folder under src >> assets and add a main.css file. This file will contain all the global CSS.

Now, we need to import the created CSS file; which can be done under the main.js file. Import the file as below

import './assets/css/main.css';

If we want to add multiple global CSS files we can simply add the file and import it in main.js as described.

Share:

Change the HTML title tag and favicon icon on newly created VueJs application

This is a quick tutorial on how we can change the HTML document title and favicon in the Vue.js application

If we are creating the VueJs application with Vue CLI then it will automatically import the project name as HTML title and default VueJs favicon icon.

To change this, go to the project directory, we can see the public folder there we can find the index.html file if we open the file we can see the title tag as below:


<title><%= htmlWebpackPlugin.options.title %></title>

Simply remove the dynamically imported content inside the tag and add the desired title to it

<title>360learntocode</title>

Now let's change the default favicon. For this, go to the same public directory where we can see the favicaon.icon.

Simply replace your favicon icon here with the same name or if we want to use it with a different name then change the name inside index.html file

<link rel="icon" href="<%= BASE_URL %>360learntocode.ico">
Share:

Thursday, January 13, 2022

How to use share functionality using web share API in VueJs application

In this tutorial, we are going to implement the web share functionality using Web Share API.

Web Share API is not supported for all browsers. We can see the supported browser for this API from caniuse.


Please follow the tutorial for sharing on social media platforms.

The Web Share API provides a mechanism for sharing links, text, files, and other content utilizing the sharing mechanisms of the underlying operating system. Note that this API only can be used over the secure connection HTTPS.

Sharing Links and Text Description

Let's create a sample vue component called Share.vue and add the following HTML inside the template which contains a simple button to allow users for sharing.

<div class="share" v-if="isSupported">
    <button class="button" @click="webShare">Share</button>
</div>
.button {
  background-color: #4CAF50;
  border: none;
  color: white;
  padding: 15px 32px;
  text-align: center;
  text-decoration: none;
  display: inline-block;
  font-size: 16px;
  margin: 4px 2px;
  cursor: pointer;
}

Here, if the browser supports the API, we are rendering the share button to allow the user to share. If not then we are hiding the button. Now, let's add the data and method used

created() {
    this.isSupport();
  },
  data () {
    return {
      isSupported : false,
      url : "https://caniuse.com/web-share",
      title:"Web API Share",
      description: "Web API Sharing"
    }
  },
  methods: {
    isSupport() {
      if (navigator.share) {
        this.isSupported = true;
      }
    },
    webShare() {
      let self = this;
      navigator.share({
        title: self.title,
        text: self.description,
        url: self.url
      })
    }
  }
}

webShare function allows the user to share link and title and description on different applications of OS.

Sharing Files

webShare() {
      let self = this;
      fetch("file_url").then(function (response) {
        return response.blob()
      }).then(function (blob) {
        let file = new File([blob], "picture.jpg", {type: 'image/jpeg'});
        let filesArray = [file];
        if (navigator.canShare && navigator.canShare({files: filesArray})) {
          navigator.share({
            title: self.title,
            text: self.description,
            files: filesArray,
            url: self.url
          });
        }
      });
    }

If we want to share the file, first load the file and test whether the file can be sharable or not, if it is sharable then it will be shared over the available supported application of OS.

The overall implementation looks as below:

<template>
    <div class="share" v-if="isSupported">
        <button class="button" @click="webShare">Share</button>
    </div>
</template>

<script>
    export default {
        name: "Share",
        created() {
            this.isSupport();
        },
        data () {
            return {
                isSupported : false,
                url : "https://www.360learntocode.com/2022/01/how-to-implement-social-media-share.html",
                title:"Web API Share",
                description: "Web API Sharing"
            }
        },
        methods: {
            isSupport() {
                if (navigator.share) {
                    this.isSupported = true;
                }
            },
            webShare() {
                let self = this;
                navigator.share({
                    title: self.title,
                    text: self.description,
                    url: self.url
                })
            }
        }
    }
</script>

<style scoped>
    .button {
        background-color: #4CAF50;
        border: none;
        color: white;
        padding: 15px 32px;
        text-align: center;
        text-decoration: none;
        display: inline-block;
        font-size: 16px;
        margin: 4px 2px;
        cursor: pointer;
    }
</style>
Share: